11,134 items in this album on 557 pages.
 | 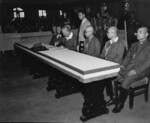 |
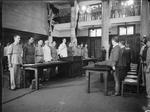
| Yasuji Okamura and the Japanese delegation departing from the site of the Japanese surrender ceremony, Nanjing, China, 9 Sep 1945 | Yasuji Okamura signing the surrender document, Nanjing, China, 9 Sep 1945, photo 1 of 2 |
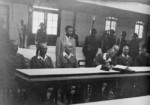 | 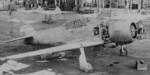 |
| Yasuji Okamura signing the surrender document, Nanjing, China, 9 Sep 1945, photo 2 of 2 | Ki-100-II aircraft, Tokyo, Japan, 10 Sep 1945 |
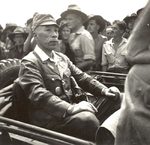 | 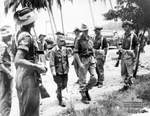 |
| Lieutenant General Masao Baba en route to the official surrender ceremony, Labuan island, North Borneo, 10 Sep 1945, photo 1 of 3 | Lieutenant General Masao Baba en route to the official surrender ceremony, Labuan, Borneo, 10 Sep 1945, photo 2 of 3 |
 |  |
| Lieutenant General Masao Baba en route to the official surrender ceremony, Labuan, Borneo, 10 Sep 1945, photo 3 of 3 | USS Alabama departing Pearl Harbor, US Territory of Hawaii, 10 Sep 1945 |
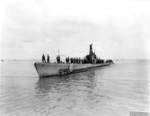 | 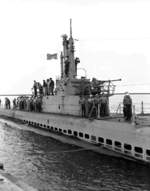 |
| USS Manta arriving at Pearl Harbor, US Territory of Hawaii, 10 Sep 1945 | USS Manta at Pearl Harbor, US Territory of Hawaii, 10 Sep 1945, photo 1 of 2 |
 | 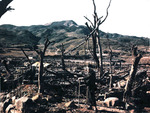 |
| USS Manta at Pearl Harbor, US Territory of Hawaii, 10 Sep 1945, photo 2 of 2 | Dr. Nagai of Nagasaki Hospital inspecting damage caused by the atomic bomb, Nagasaki, Japan, 1945; Nagai would die of radiation poisoning a few days after this photo was taken |
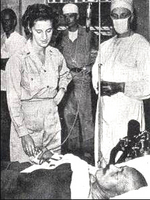 |  |
| Hideki Tojo being treated by Americans at SCAP hospital in Tokyo, Japan after his failed suicide attempt, 11 Sep 1945 | Hideki Tojo receiving medical treatment after his failed suicide attempt, Japan, 11 Sep 1945 |
 |  |
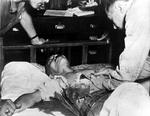
| Hideki Tojo semiconscious after a failed suicide attempt, Japan, 11 Sep 1945 | Battleship Nagato, Yokosuka, Japan, 12 Sep 1945 |
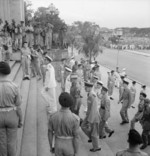 |  |
| Louis Mountbatten and his Chiefs of Staff entering the Municipal Buildings in Singapore for the surrender ceremony, 12 Sep 1945 | Louis Mountbatten at the surrender ceremony, Municipal Building, Singapore, 12 Sep 1945, photo 1 of 2 |
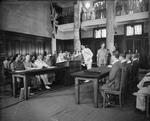 |  |
| Louis Mountbatten at the surrender ceremony, Municipal Building, Singapore, 12 Sep 1945, photo 2 of 2 | Louis Mountbatten inspecting British Royal Navy Guard of Honour outside the Minicipal Building, Singapore prior to the surrender ceremony, 12 Sep 1945 |
11,134 items in this album on 557 pages.
Change View
Desktop ViewSearch WW2DB

News
- » The Emperor of Japan Planned to Honor WW2-era Japanese POWs in Mongolia (4 Jul 2025)
- » US State Lawmaker John Winter Caught Using Racial Slur "Jap" and Apologized (11 Jun 2025)
- » Köln/Cologne Evacuated After Discovery of WW2 Bombs (4 Jun 2025)
- » Race, Holocaust, and African-American WW2 Histories Removed from the US Naval Academy Library (7 Apr 2025)
- » US Government Plans to Purge WW2 Information (17 Mar 2025)
- » See all news
Current Site Statistics
- » 1,179 biographies
- » 337 events
- » 45,089 timeline entries
- » 1,246 ships
- » 350 aircraft models
- » 207 vehicle models
- » 376 weapon models
- » 123 historical documents
- » 261 facilities
- » 470 book reviews
- » 28,481 photos
- » 365 maps
Famous WW2 Quote
"Since peace is now beyond hope, we can but fight to the end."Chiang Kaishek, 31 Jul 1937